
Hand-Sewn Lace Insertion
The following tutorial guides you through how I did lace insertion for the most recent cap I stitched for a museum in Tennessee. It is a cap based on a portrait of Susan Winchester c. 1817. You can read about that project here. While I used this insertion technique on this cap you can apply it to any lace insertion project you may be inspired to stitch up!
Make sure you scroll to the end— there list of the materials I used for this insertion project.
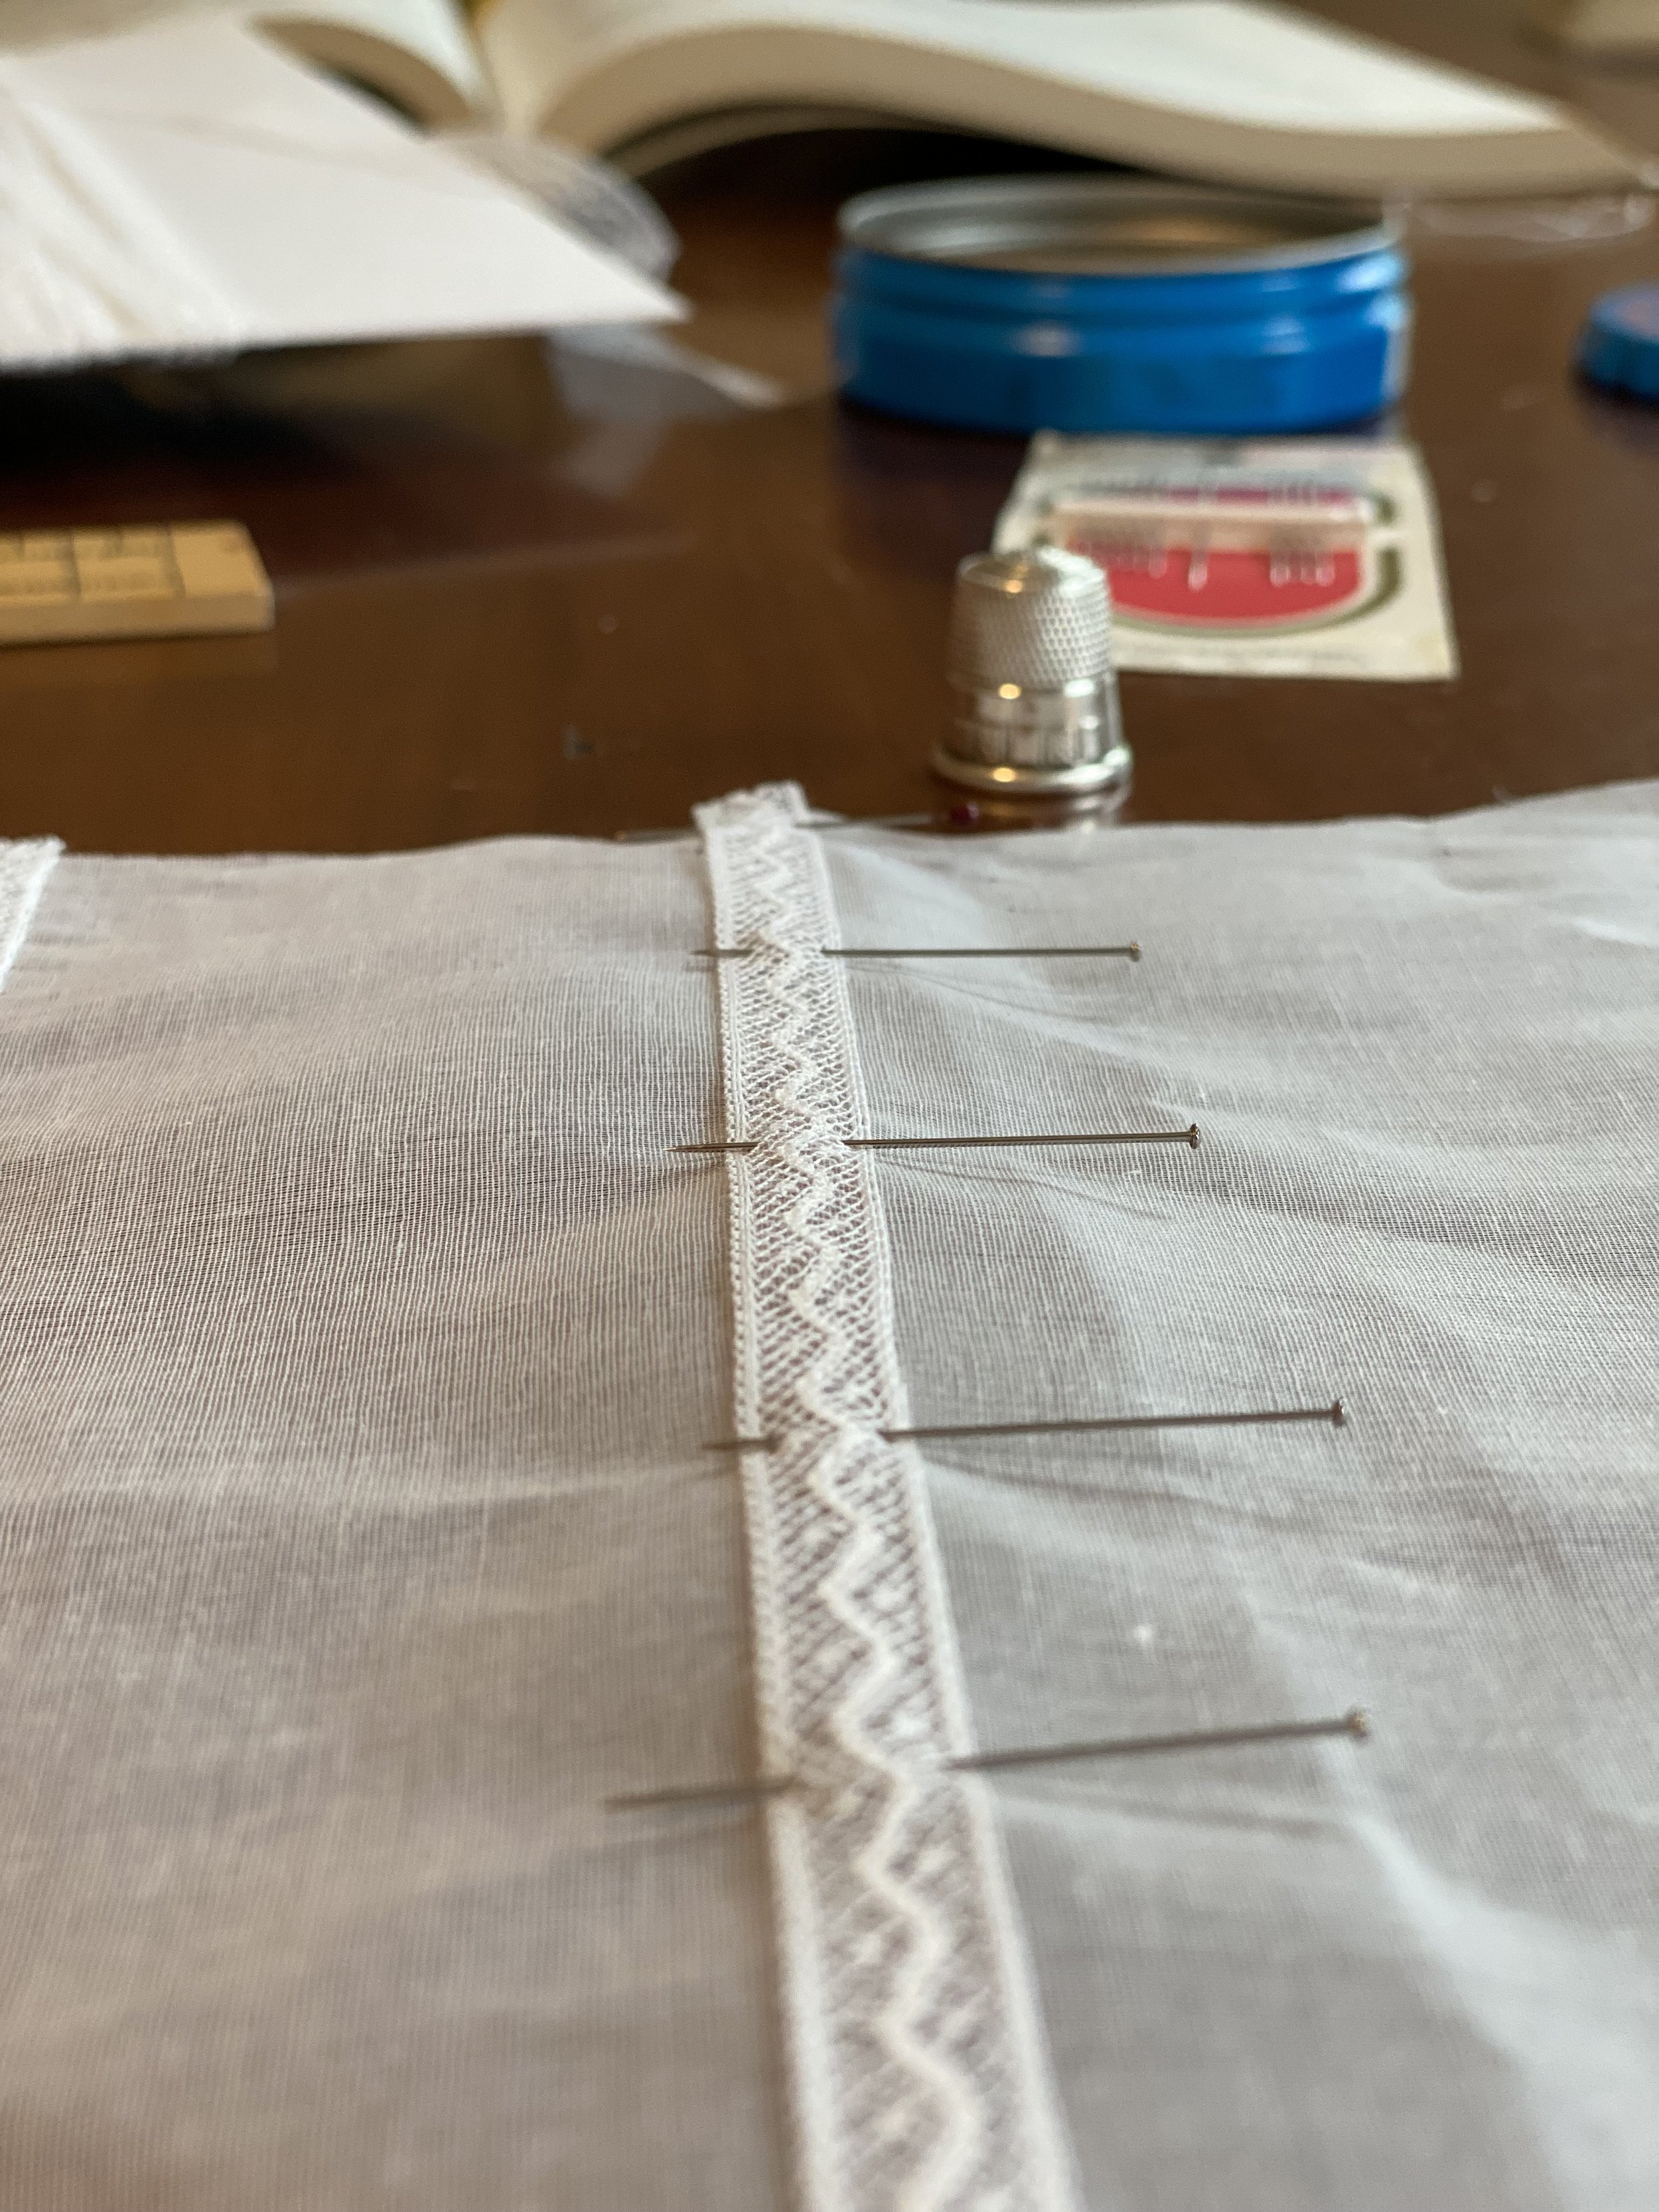
I am using a lace designed for insertion. The two selvedges are finished and are straight. I pinned the lace on outside of the cotton organdy, making sure the right side of lace is facing up. Notice how the lace is follow the grain line of the fabric. The edges of the lace are parallel to the edges of the grain line of the textile. I pinned the lace to the fabric perpendicular to the lace using very sharp dressmakers pins.

I used a felling stitch to sew down the lace. Stitching with Gutermann silk thread I stitched the loops of the edge of the lace’s selvedge to the fabric about 8-10 stitches to the inch. I pinned, then sewed, then I positioned my next piece of lace across the section I was working.

Once I was done sewing all my lace down I turned the work over and took my small embroidery scissors and carefully cut the cotton organdy spacing my cut mid-way between the selvedges of the lace. (ONLY the cotton!! do not cut the lace!)

I opened up the raw edges from the backside of the work.

I folded the raw edges of the cut edge up once and then up a second time and felled the folded edge down using a felling stitch. I did about 8-10 stitches per inch.

Finished insertion from the back.

Finished insertion from the front.

All insertion in cap!
Materials used:
French Val Lace #21279: http://importedlaces.com/imported-laces-online-catalog-page68.html
Cotton Organdy: Textilefabricstore.com
White Gutermann silk thread: https://www.joann.com/silk-800-white/2976934.html
Size 8-10 betweens/quilters needles (antique)