
Pulling Threads
Pulling threads out of the weave structure of a textiles is a fantastic technique to have in your hand-sewing tool kit. I recommend using this cutting technique when cutting out geometric garments made from medium to lightweight wovens that you intend to hand stitch. I love this technique because it allows you to have a perfectly straight-line along the grain. When I make an historical shirt, for example, the seam-allowances (or turnings as they were called) are very small. Having a perfectly straight piece of fabric to work with makes hemming and sewing seams easier and more precise. It is also a great technique to use to “true” (straighten) up the top of your fabric after you have washed it when the top of the textile is frayed and messy.
This technique does take a little bit of practice and patience but it is worth it. If you enjoy the slower, rhythmic nature of hand-sewing you will probably like pulling threads. This technique is a great way to study your fabric and understand the weave structure. If you have been wondering “what is a warp?” “what is the straight of grain?” this process intimately engages you with the textiles and its weave structure.
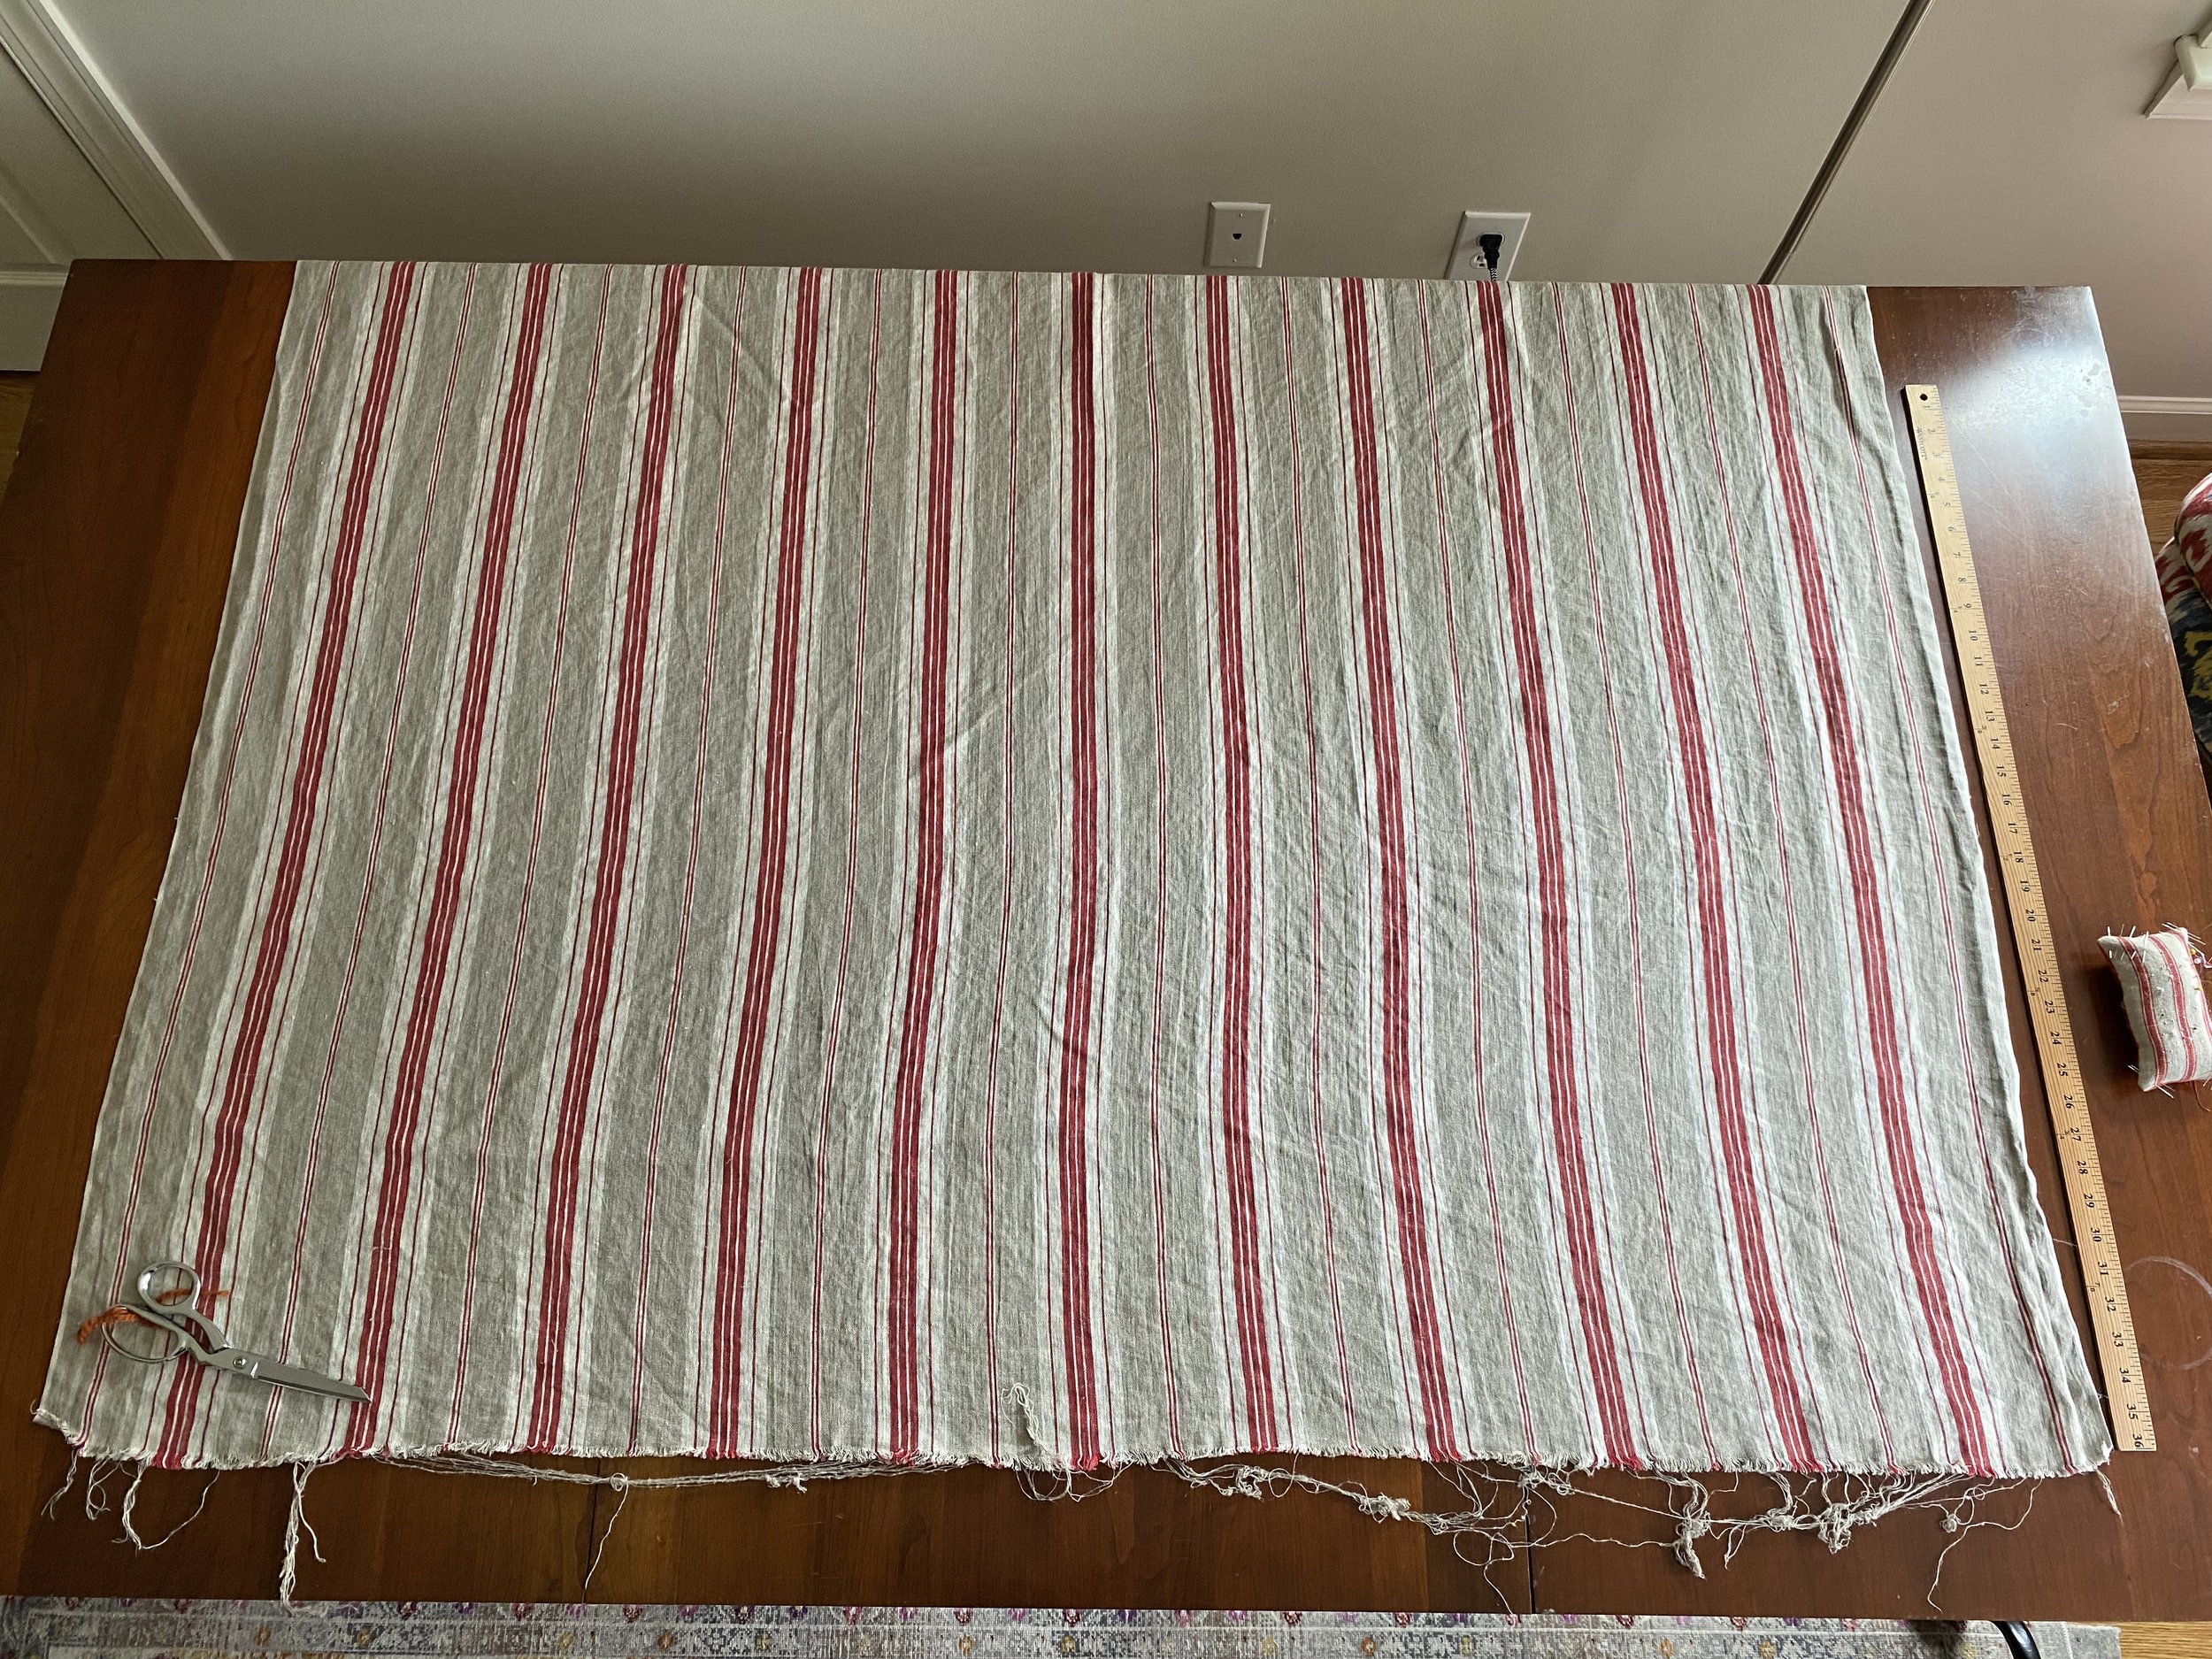
To “true” up the top of your fabric: lay the textile out on a large surface with the messy edge parallel to the edge. The frayed edge is parallel with the “weft” or “cross-grain” of your textile. The straight edge of fabric that has a finished edge is called the “selvedge.” The selvedge runs parallel with what is called the “straight-of-grain.”

Carefully study the top of your fabric. Notice how it is not straight, it is curvy or almost like a stair-step. This is because weft yarns have pulled out of the weave structure in different sections. Notice in the image above how there is more fabric towards the top and less fabric towards where I began cutting. This is because more weft yarns have been pulled out closure to where I started cutting. You want to begin cutting and pulling a thread on the side of the selvedge that the most weft yarns have been removed. When you cut and remove a weft thread you do not want to hit a section that the weft threads have already been removed.
To begin: Use your dressmakers shears to cut perpendicular into the selvedge. Try to cut between two yarns along the weft.

Pull the cut section apart. A weft thread should pull out of the weave structure. This weft thread is now your best friend. This is the thread you will remove from across the weft. If a weft thread does not easily dislodge from the fabric, use a pin to gently pull it out of the weave structure.

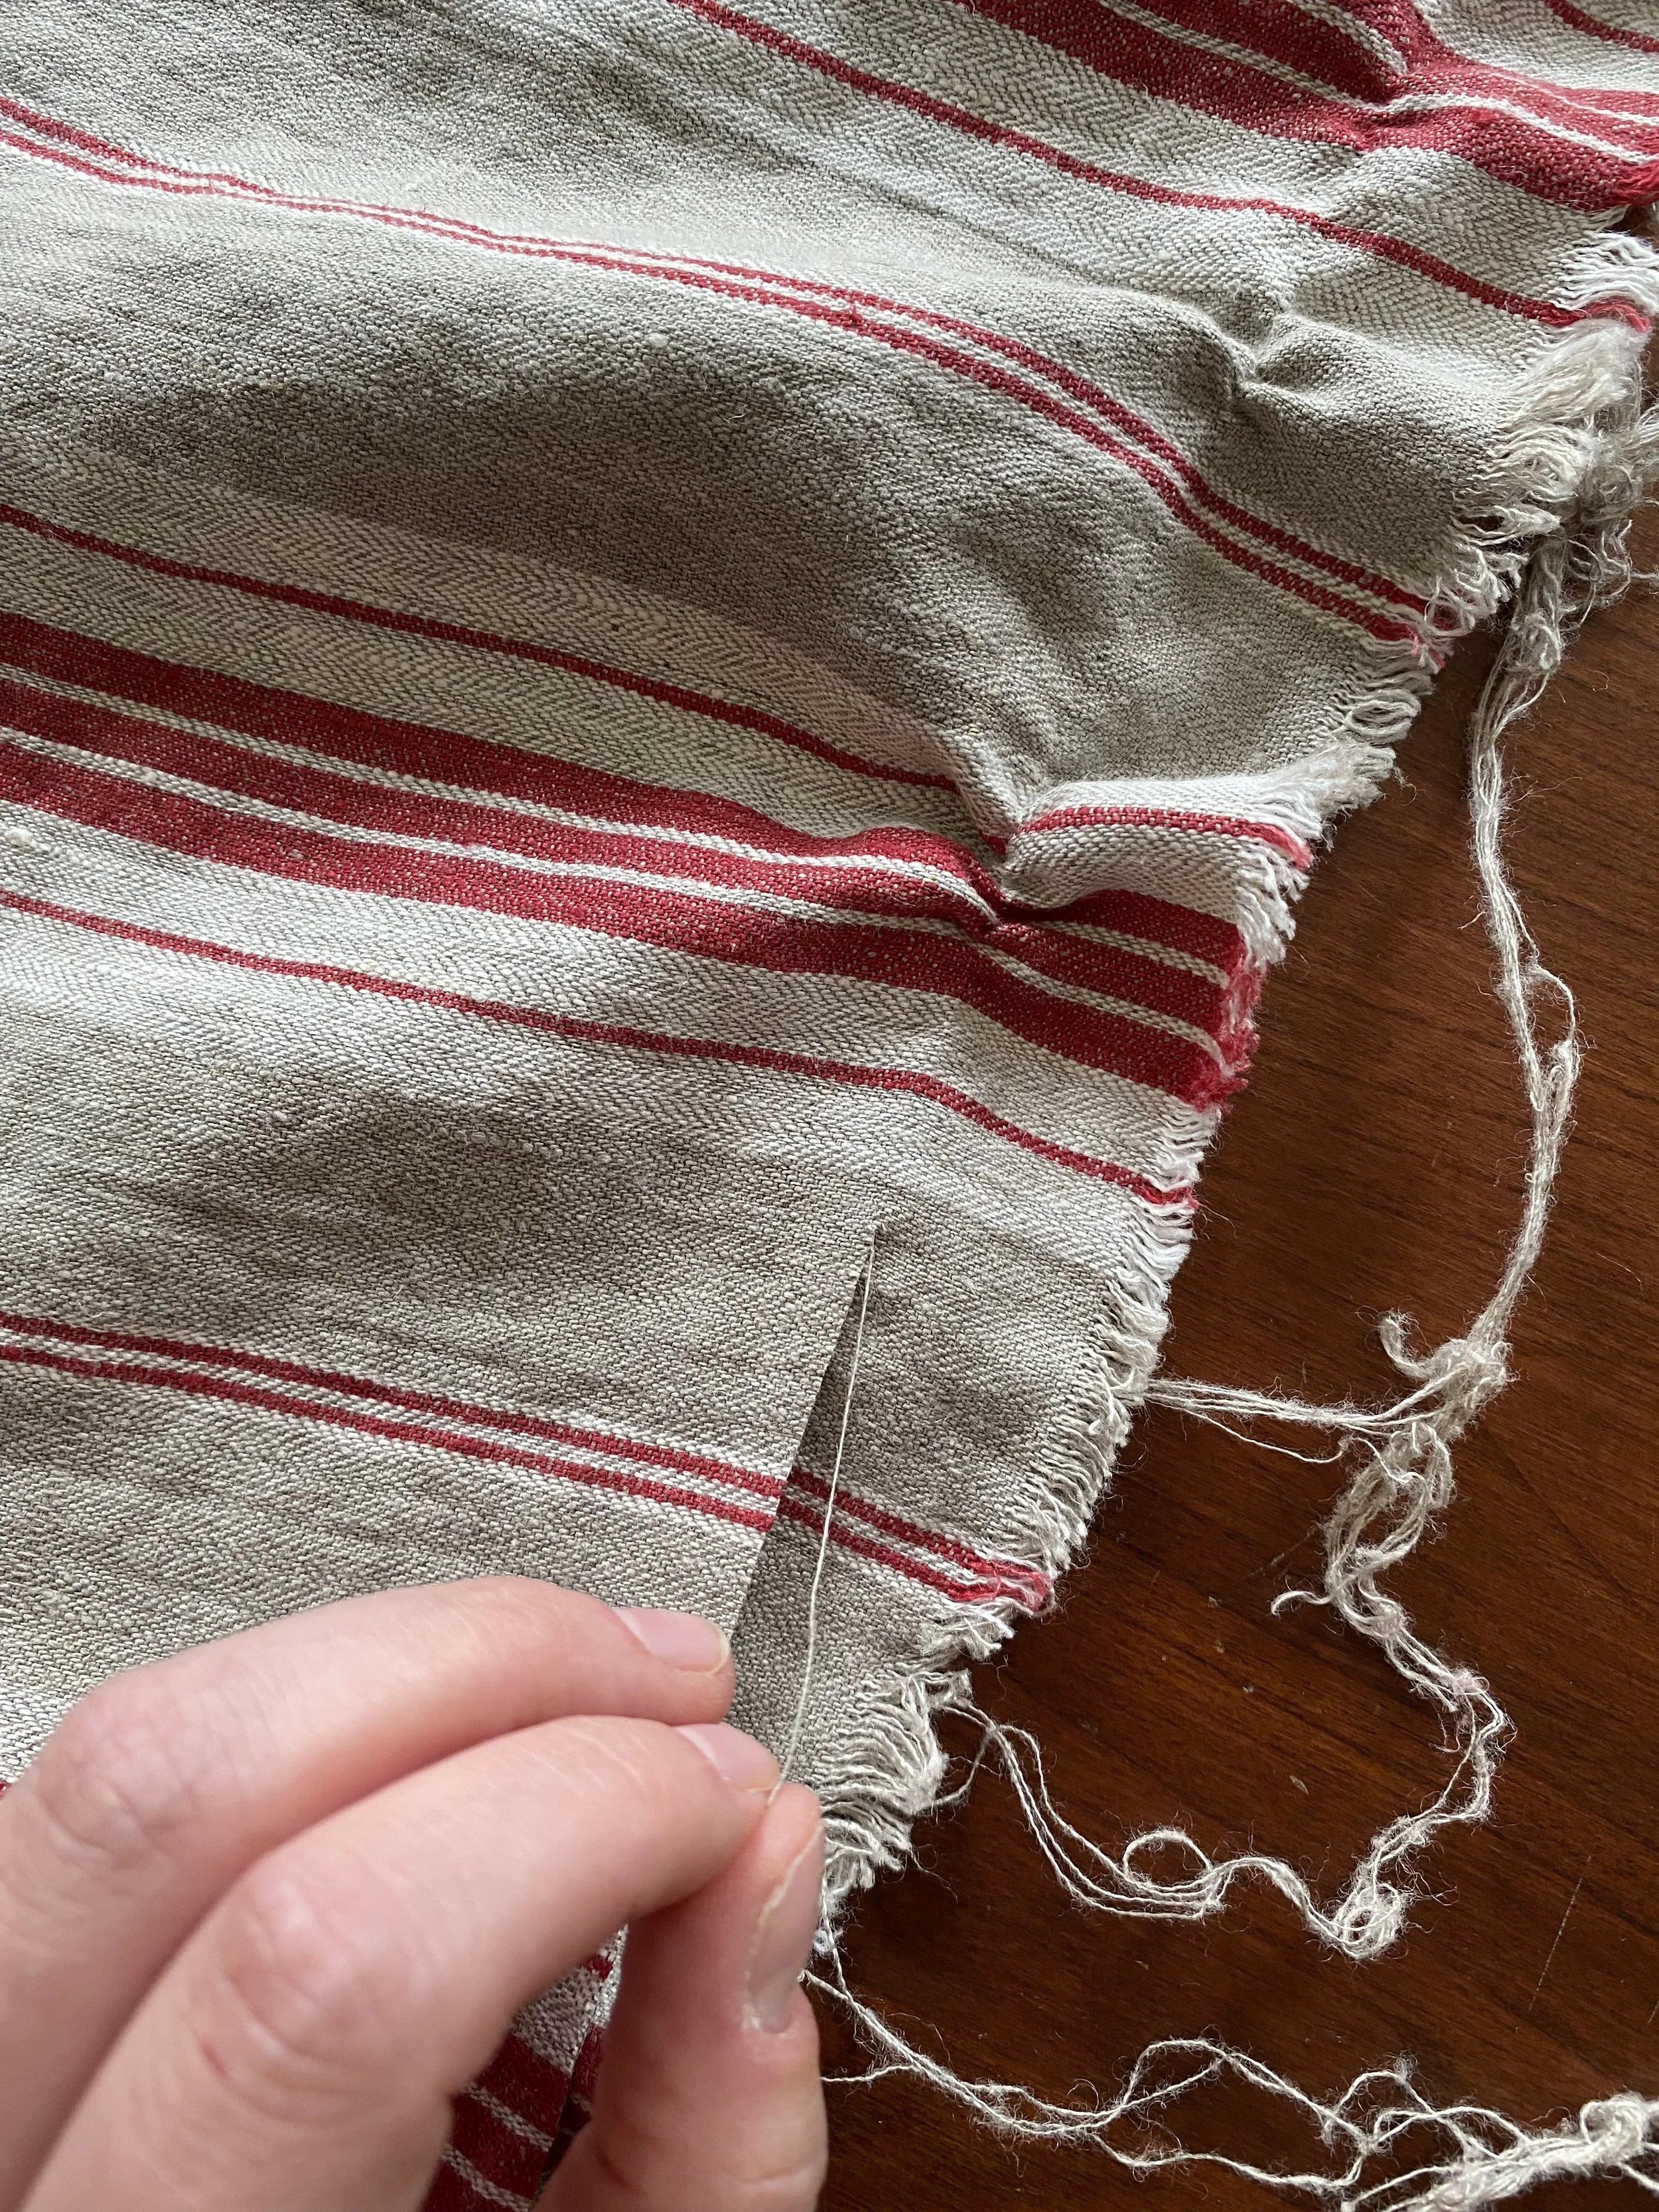
Hold the base of the weft thread that is still in the textile with your non-dominant hand and gently pull the loose weft thread with your dominant hand. The fabric will likely start to pucker as seen in the image above. Use your non-dominant hand to push that puckering across the weft. It is likely at some point the weft thread you are removing is going to break. Great! Pull that out. Note: if the weft is being ornery grab a pin and use the tip of the pin to carefully dip the tip under the yarn and pull it up and away from you.

Notice above how the weft yarn has been removed from the fabric. It creates a small voided space.

Grab your dressmakers shears and cut along this voided space until you get to the point where the yarn is still in the weft. When you get to this point you will cut very carefully in-between the weft thread you are removing and yarn next to it.
Then coax your weft thread out of the weave structure with a pin. Pull it (or keep using the pin to pull it up and out) again like you did before. Repeat this process of pulling the yarn out and cutting along the voided space until you get across the entire width of the fabric.

Look at this beautiful straight edge! Now you can confidently measure down into the fabric using this top edge knowing it is “true” or straight.

Once the top of the fabric is “true” you can cut out your garment. I do this by measuring along the warp and across the weft to create different rectangular or square shapes depending on the garment. This image shows me pulling a thread from the warp.

This is a pocket I cut out using the pulling thread technique. I measured up and over to remove the warp and weft threads. Then I cut out this rectangular shape.

I pulled threads before I hemmed this section. You can see how the folded hem is straight along the grain line. When you pull a thread you can trust the cut edge is straight so you can precisely fold a small hem and trust the width of the fold.